Blog
There’s no place like localhost: A beginner’s guide to home servers
Introduction
Does it seem like everything you do online is tied to a subscription? Are you increasingly worried about companies exposing or exploiting your data? Are you interested in making the leap from being your friends’ or family’s IT guy to being an actual IT professional? Then it might be time for you to build a home server.
Don’t be intimidated. A home server is simply one or more computers that you set up to run software and store files under your full control. No vendors in the middle, no recurring fees, and no ambiguity about where your data is and who gets to access it.
It may seem ridiculous to encourage you to build a computer in this economy. NAND and DRAM shortages are inflating the prices of computer hardware, including a lot of what you need to build a home server. However, unlike a gaming PC or a high performance workstation, there’s a decent chance that you already have hardware good enough to be your first home server.
There’s more good news. Software and support these days are way more accessible than during the early years of home servers. You have access to a mature open source library, many active communities, and decades of knowledge and experience compiled as guides online, such as on YouTube or Reddit.
Once you have everything up and running, your home server can significantly reduce your monthly bills and risk of exposure. Best of all, you’re in control. Not only of your data, but also of your home server’s purpose and how complex your setup will be.
This starter guide to home servers is also about keeping you in control. Instead of telling you exactly how to start or what parts to pick, we’ll present you with three questions. Your answers will help you decide which of the options and detailed resources we share you should dive into.
Question 1: What do you want to do with your home server?
This is the most important question. Having goals and challenges that truly excite or motivate you will help you power through the trickier parts of the hobby. Your answer can also simplify your hardware and software checklist.
1.1: Store and stream media
This is one of the most common reasons people get into this hobby. Jellyfin is our recommended application for streaming media, from movies to books. You can also automatically back up content that you definitely already own using Starr. It combines several open source tools into one unified download system. For a comprehensive guide on building a media server, check out Perfect Media Server.
1.2 Self-host alternatives to commercial services
The salve for subscription sickness and cure for chaotic collections. With a home server, you can replace Google Photos with Immich. Ditch Dropbox for Nextcloud. Digitize and search through physical documents with Paperless-ngx. Block ads for all devices in your home network - computers, phones, smart TVs, fridges, etc. - with AdGuard. Head to Awesome Self-Hosted for more on self-hosting.
1.3 Automate your home
Home Assistant is the ultimate independent smart home tool. Instead of juggling multiple platforms and apps with no control over how long a brand will support your device, Home Assistant is a nearly universal control center that runs entirely on your home network. The Home Assistant Cookbook links to various guides and forum rules from the developers and their community.
1.4. Learn IT skills
If you’re wondering how a home server differs from a “homelab”, here’s where that distinction comes in. Put simply, a homelab is a home server that lets you experiment in isolated environments instead of directly on your hardware. Tinker with all sorts of software and configurations, figure out how and why they break, and then fix them.
Homelabbers typically manage their sandboxes using Proxmox Virtual Environment (VE). GNS3 lets you simulate and troubleshoot networks. Grafana is one of the most popular tools for monitoring systems, networks, and data, an essential skill for DevOps, system administration, and more. StorMagic’s homelabbing overview and Jim Gogarty’s guide for IT professionals are beginner-friendly launchpads to learning. If you’re ready to dive deeper, the r/homelab subreddit has a wiki for you.
Question 2: What hardware can you get your hands on?
Now that you know what you want to do, looking up spec sheets and asking about recommended computer models should be easier. But before you start shopping, look around you. The machines you already own may be good enough to start.
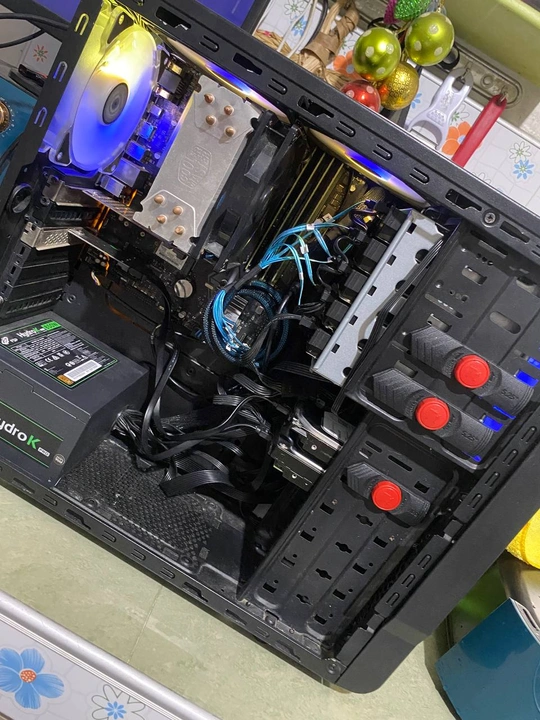
2.1: A desktop PC or laptop
Even if you have several use cases for your home server, a computer with an Intel Core i5 or AMD Ryzen processor plus at least 8GB of RAM would still be a great starter system. Desktop PCs give you room to upgrade, which is a nice long term benefit. Meanwhile, the built-in battery in laptops doubles as an uninterruptible power supply (UPS).
2.2: Mini PC
Beelink SER, Minisforum UM, Aoostar Gem, Lenovo ThinkCentre M, HP EliteDesk Mini, and Dell OptiPlex are some of the most popular lines of mini PCs among home server enthusiasts. As with all other options here, check out secondhand markets before you go for a brand new mini PC.
2.3. NAS device
If a media server is your primary use case, NAS devices from Asustor, Ugreen, or Beelink are great beginner-friendly options. They’re not as flexible as general purpose computers though. You should also account for storage in the total cost of your home server, since you’ll probably want at least a pair of high capacity drives.
2.4 Raspberry Pi and other single-board computers (SBCs)
If you just want to self-host one tool that’s not too resource-intensive and will ideally run 24/7 such as AdGuard or Home Assistant, SBCs offer unbeatable space- and power-efficiency. That said, with prices being as horrible as they are, top of the line SBCs such as the Raspberry Pi 5 currently cost almost the same as a used mini PC with a more powerful Intel N100 CPU. Unless you really want to save every watt or inch of space possible, we’d recommend getting a mini PC over a similarly priced SBC.
2.5 Used enterprise servers
These machines are really only for those who want to beef up their IT skills. Even if you get them for free, their vendor-specific hardware and software are complicated enough to turn you off from the hobby if you have no prior experience with them. Some vendors also won’t share updated firmware or drivers for their machines unless you pay for a support contract, which is as expensive and cumbersome as it sounds. Not to mention these servers are large, loud, and power-hungry.
We have one final tip for hardware, especially if enterprise servers are too much for you: don’t think about multi-machine setups yet. Choose one device, configure the software, and learn as much as you can from it. Keep things simple and cheap to start. You can always scale up later.
Question 3: How will you manage your software?
You know what you want to do and what computer you can get to help you do it. Let’s bridge the gap by thinking about how you’ll install and run your home server applications.
The recommended way is to install a Linux operating system (OS) variant, such as Fedora, Ubuntu, or Debian. If you’ve never installed Linux before, don’t worry. They have installation wizards that are way more user-friendly than Windows 11’s creepy and bloated walkthrough. The more lightweight server versions of Linux OSes involve typing in a few text commands, but those are still quick and well-documented processes.
You will then install a piece of software on that OS to manage applications packaged as images. An image contains the application itself plus all other files that the app needs to run. When you open the app, it runs on the OS as a process called a container. A container behaves as if it’s the only thing running at that moment, because Linux restricts its access to only part of your hardware. That means it can’t see other files, storage, or networks that it’s not permitted to see. That includes other containers.
This self-contained design makes containers small, easy to install, and behave consistently across different types of computers, from a Raspberry Pi to an enterprise server. Think of the applications that you’ve natively installed on your PC, like games or editing tools. You may have been prompted to install additional software or data to complete the installation. You don’t have to worry about any of that with containers.As we mentioned, an application packaged in a container also doesn’t interfere with applications in other containers. This helps your home server be more secure and stable. You can move or delete a container and your other applications won’t be affected.
In short, the typical home server uses containerized applications and software to manage those apps, all installed on a Linux-based operating system.
3.1. Cosmos Cloud on Linux
This is the most beginner-friendly option. Cosmos Cloud eases you into the world of containers using the familiar app store experience. Browse the categories or search for a specific application right from Cosmos Cloud, then click Install. You can also manually import a Docker Compose file to install apps that the developers of Cosmos Cloud haven’t packaged yet on its app store.
3.2 Docker and Dockhand on Linux
Docker is one of the most popular ways to create and install containers. However, it’s meant to be used through the command line, i.e. with text commands. Dockhand lets you bypass that by giving you a web-based graphical user interface (GUI). You can then browse collections such as LinuxServer.io or Docker Hub for Docker images.
Don’t dismiss this setup as Cosmos Cloud with extra steps. Dockhand and similar GUIs are a great middle ground for using and learning about containers, and they typically include other great tools such as disk usage monitoring and security features.
3.3 Proxmox VE
This is the option we’d recommend for those interested in learning or improving their professional IT skills. Proxmox VE lets you create multiple digital computers, aka virtual machines (VMs), on a physical computer.
Proxmox VE comes with a Linux environment, meaning you install it instead of an OS, not on top of one. You create VMs and install an operating system in each of them. Each VM can then run a variety of applications, including containers.
This is overkill if all you want to do is install a handful of containers. You must also allocate portions of your home server’s processor, storage, and RAM to each VM, which may hamper their performance. But running applications in VMs is more secure, resilient, and flexible than running containers on your home server itself. It’s also much better for learning and experimentation than our previous options.
Additional equipment
At this point, we hope you have a great idea about the why, what, and how of your very first home server. We’d love to say we’re done, but we’d rather play it safe.
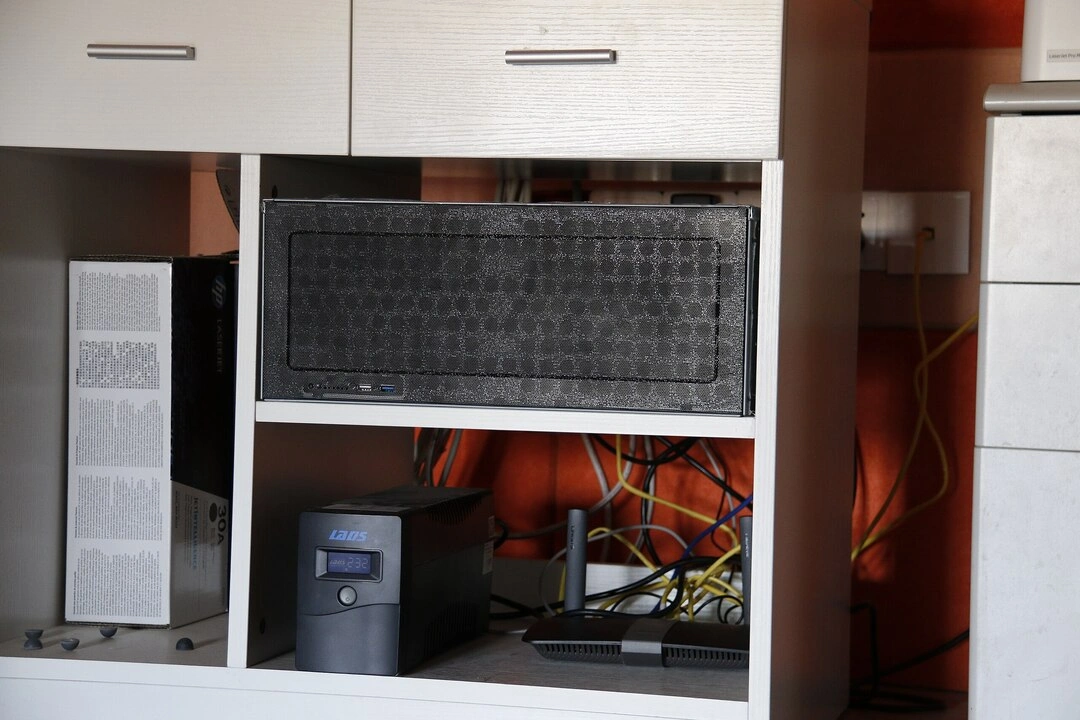
UPS
If you’re on a tight budget and are just testing out a handful of apps, you could get by without protection from power outages. But a UPS quickly becomes non-negotiable the more you use and invest in your home server. Think of it as your home server’s seat belt. One random power spike or outage can be enough to corrupt your files or damage your server itself.
A UPS regulates incoming power from the outlet to prevent spikes from reaching connected devices. But its main feature is its built-in battery. It stores enough juice to keep all connected devices on for a couple of minutes. That should give you enough time to properly shut down your home server.
Even if you hardly experience power outages in your area, one second without power is enough to take out most electronic equipment. Forget major outages or a storm; a playful pet can bring your home server down. A UPS will send its stored charge to plugged devices within milliseconds of an outage.
Basic low capacity models can take care of most single-machine servers. Even popular brands such as APC and CyberPower have affordable options in that tier.
Storage drives
As we noted earlier, you should account for this in your budget if you mainly want to stream media. Unfortunately, this component has seen crazy price hikes due to AI hype and the current memory chip shortage. You may be able to get a good deal on secondhand drives, but be extra vigilant and shop only from trusted sellers.
Cables
The number of power, data, and networking cables you need and the mess they make increase exponentially as you add more devices to your home server. We’re only half kidding. This is one of the reasons we suggest you should focus on a single-machine setup to start.
Network switch
If you want to learn IT skills, you’ll probably go multi-node right away. Aside from lots of cable organizers, you’ll also need a network switch to connect your server’s distributed brains to each other and to your network, and to allow you to learn about, well, networking.
Build with OpenSFF
As you start to shop around and design your first home server, you may realize just how janky and cluttered your build will be, especially if you decide to use more than one machine. Wouldn’t it be nice if there was a tidy, vendor-agnostic, and modular option for home servers and other computers? That’s what our hardware standard is all about. We believe future enthusiasts will be happy to build home servers using OpenSFF components.
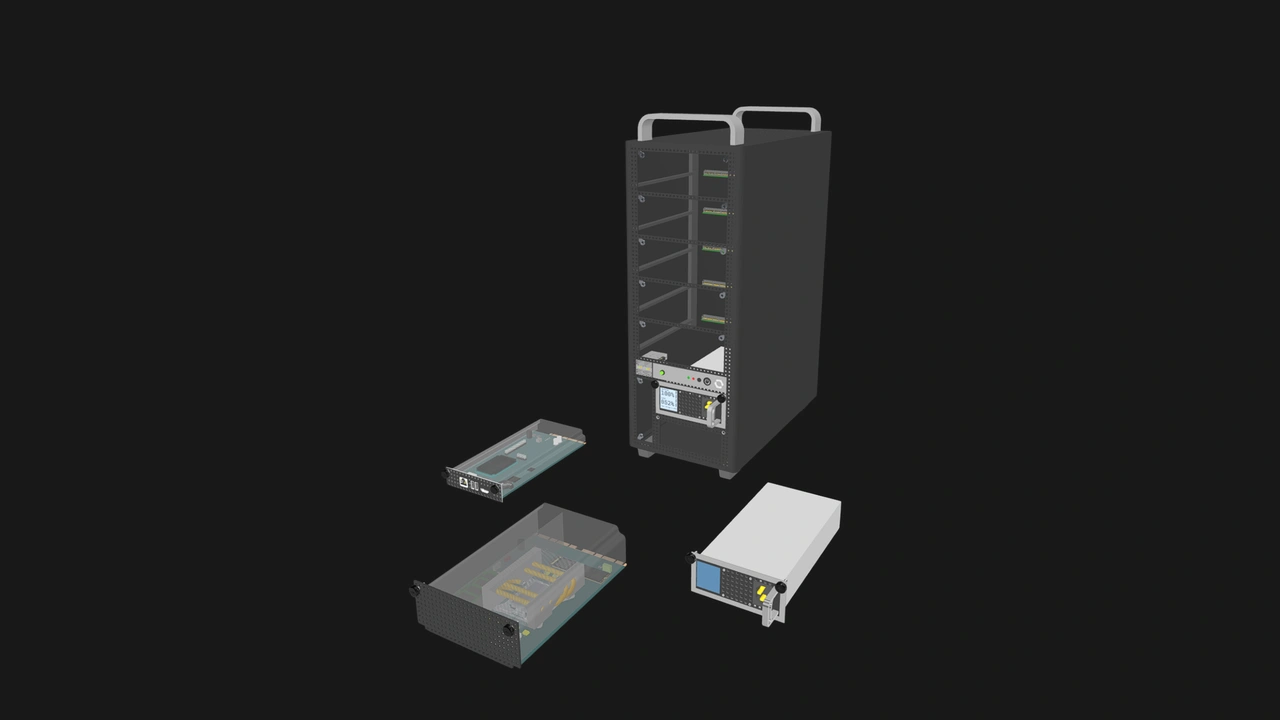
First off, no more cable clutter! Enclosures deliver power and networking to installed Compute Nodes via a standardized connector. Vendors can also add internal network switches to their Enclosure, drastically reducing the cables and devices you need to connect, organize, and track.

Second, our specifications are open source, and we’ll prioritize interoperability in our upcoming certification process. You’ll be able to mix and match Enclosures, Compute Nodes, and Management Modules from different vendors, but they’ll fit and work together as one system. It’ll be a lot like assembling a desktop PC, but with far fewer cables.
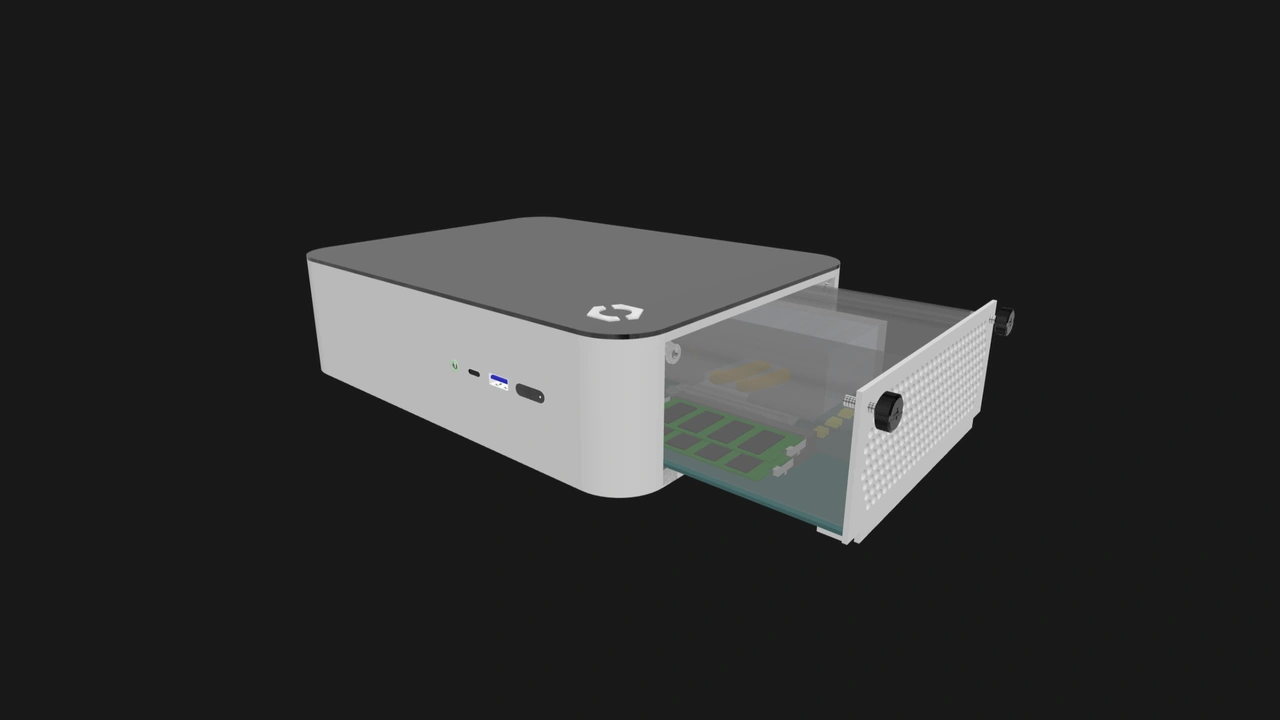
Third, while we expect our standard to mainly be used to make multi-node systems, vendors can easily make single node Enclosures too. Your future home server could be an OpenSFF mini PC! Then you can take the Compute Node inside that and slot it into a multi-node Enclosure when you want to scale up.
Tomorrow’s homelabbers will also be grateful for the Enclosure microSD card (ESDC). Many enterprise servers also use SD cards to store management data. But for security reasons, businesses often remove those cards before they get rid of their server. Even if you could access the card slot on such a machine, the real issue is getting your hands on the essential files that need to be on the card.
The ESDC on the other hand is user-replaceable, and vendors who make OpenSFF-compatible managed Enclosures must make at least some of the ESDC data publicly accessible. If you got your hands on an Enclosure that no longer has its ESDC, you can use any microSD card and potentially restore the missing metadata. Together with the equally replaceable Management Module, the ESDC will help managed OpenSFF systems serve multiple lives.
Thanks for indulging our brief detour into the future. We hope this guide helps you decide to build your first home server. Start with clear goals, with hardware you already own, and with assurance that help is just a quick search away.
If you enjoyed reading this, we’d be grateful if you could spread the word about OpenSFF and our specifications. For technical clarifications, partnerships, and other inquiries, reach out to our development team at [email protected].
Other Articles

Meet OpenSFF: an open hardware standard that enables cross-vendor compatibility, modular systems, and sustainable hardware reuse.
August 11, 2025
We go over the rise of virtualization and the open software adopted by home server enthusiasts, as well as the current challenges and the future of the hobby.
September 06, 2025

Learn why OpenSFF adopted the SFF-TA-1002 connector standard and how it enables our vision.
September 18, 2025